These crash hot potatoes were all the rage back in 2008. Like most food bloggers, I made them a few times and then they fell off my radar.
Recently, I was looking for a side dish to go with burgers. I had planned to make potato salad, but the day got away from me. Normally I'd go with my standby roasted potatoes, but we were out of red potatoes. It was late afternoon and I had no clue what to make with my basket full of Yukon golds. I Googled Yukon gold potatoes and side dish and while these potatoes didn't come up in the initial search, something I clicked on reminded me of them and off I went.
Baby Girl, being the insane child she is, doesn't like potatoes. She took a tiny nibble and then said "no thank you." She won't eat French fries, mashed potatoes, tater tots, home fries, etc. either. Weirdo. SP and I loved them. He was especially enamored of them, so much so that he insisted I make them again the following night. They do take a bit of planning ahead because you have to boil the potatoes whole, smash them and then bake them, but the hands-on time is minimal. I used fresh herbs from my garden (rosemary and thyme), which was the perfect combination. And I love that you can make as many as you want - I made four the first night and five the next and we ate the leftovers the next day, reheated in the toasted oven to try to bring back some of the crispiness.
Crash Hot Potatoes
As seen on The Pioneer Woman
Small Yukon gold potatoes (as many as you want to serve)
Olive oil
Kosher salt, to taste
Black pepper, to taste
Fresh rosemary and thyme, to taste
Scrub the potatoes well and place in a large pot. Try to choose potatoes that are roughly the same size so they'll all cook at the same rate. Cover the potatoes with cold water and add some salt. Place the lid on the pot and bring to a boil. Cook the potatoes for 20 minutes, or until they are fork-tender.
Drizzle some olive oil on a baking sheet and use a pastry brush to spread the oil evenly. Drain the potatoes and place them on the baking sheet, leaving plenty of room between each potato.
Using a potato masher, gently press down on each potato until it flattens. Brush the tops of each crushed potato with more olive oil. Sprinkle the potatoes with plenty of kosher salt, fresh ground black pepper and fresh chopped rosemary and thyme.
Bake in a 450 degree oven for 20-25 minutes until golden brown and crispy. Serve hot.
Thứ Tư, 29 tháng 10, 2014
Thứ Hai, 27 tháng 10, 2014
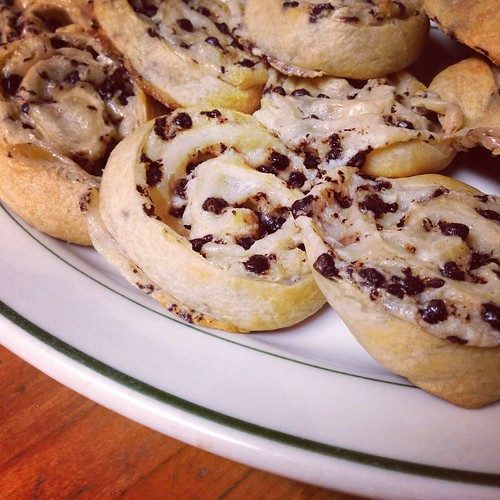
Chocolate Chip Cream Cheese "Cookies"
I'm not sure where I first saw these Chocolate Chip Cream Cheese Breakfast Cookies but my best guess is one of my friends shared the link on Facebook. Or maybe it was one of the blogs I follow. Either way, as soon as I saw them I knew I had to make them. I printed off the recipe and waited for the right time.
The right time came a few weeks ago for Sunday dinner with my parents. A friend of theirs was over so we had enough people to make a dent in the cookies (they don't really reheat well). Of course mine look nothing like the ones in the original blog post but who cares. They still tasted phenomenal and are so simple to make.
I baked these at my mom's house and they took a bit longer than the 12-14 minutes stated in the recipe so my suggestion is to watch them closely after the 15-minute mark and take them out when they're golden brown. Mine sort of fell apart, but like I said, it didn't matter. We all loved these. They are definitely best served warm. When they sat for more than a few minutes they got a bit chewy and tough so bake them right before you want to eat them.
PS. I took the word breakfast out of the title because, let's be honest, these are not breakfast food. I also put cookies in parentheses because they aren't really cookies either.
Chocolate Chip Cream Cheese "Cookies"
As seen on Cookies and Cups
Makes approximately 15 cookies
1 can seamless crescent rolls
1 (8 oz) block cream cheese, at room temperature
1/4 cup sugar
2 teaspoons vanilla
1/2 cup mini chocolate chips
Unroll the crescent roll sheet and stretch the dough out slightly in the shape of a rectangle.
Using a hand mixer, beat the cream cheese, sugar and vanilla together until smooth in a medium sized bowl. Spread the cream cheese mixture over the top of the crescent sheet, leaving an edge of about 1/2 inch. Sprinkle the chocolate chips on top of the cream cheese.
Roll the crescent sheet up tightly and wrap in cling wrap. Refrigerate overnight.
When you're ready to bake them, preheat the oven to 350°. Line two cookie sheets with parchment paper.
Slice the roll into 1/2" slices. Arrange half the slices on each baking sheet. Bake for 10 minutes, then rotate the sheets (move the sheet on the bottom rack to the top rack and vice versa, as well as turn the sheets a half turn). Bake for another 5-10 minutes, until they turn golden brown around the edges. Transfer to a wire rack and allow to cool slightly. Eat warm.
Thứ Sáu, 24 tháng 10, 2014
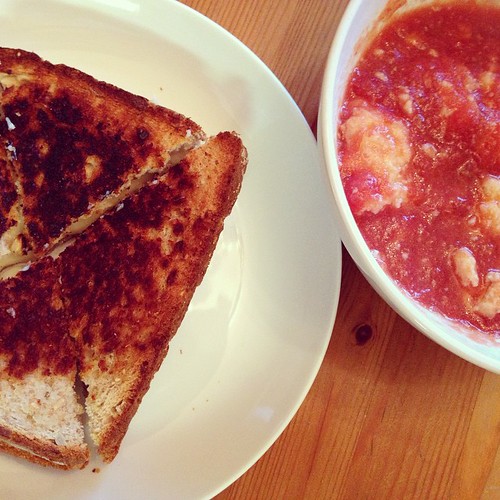
Tomato Soup with Butter Dumplings
My mom has been making Tomato Soup with Butter Dumplings for years. I tried to make it once and failed miserably. We recently went to Disney World for Baby Girl's 5th birthday and my mom graciously offered to drive us to the airport. Since our flight was so early, she spent the night at our house before we left. We wanted a simple dinner that wouldn't yield leftovers, so I asked her to make tomato soup with butter dumplings.
She always uses tomatoes we've canned to make the soup, but I think you could substitute whole, peeled tomatoes if you don't have canned tomatoes available. This is most definitely a trial and error recipe. I don't think anyone gets it right the first time (I know I didn't). Practice makes perfect, though, so if you're at all interested in this one, keep trying.
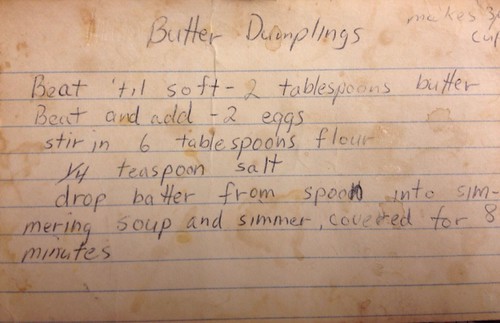
This is the original recipe. I think it came from my stepgrandmother. As you can tell, it's been around for quite awhile!
Tomato Soup with Butter Dumplings
3 jars canned tomatoes (or 2 28-oz cans whole, peeled tomatoes)
salt, to taste
2 tablespoons butter, at room temperature
2 eggs, at room temperature
6 tablespoons flour
1/4 teaspoon salt
Open the jars (or cans) of tomatoes and dump the contents into a large pot. Use an immersion blender to lightly puree the tomatoes. You can also puree the tomatoes in a food processor. Heat the tomatoes over medium-high heat until boiling. Add salt to taste.
Beat the butter until soft. Beat in the eggs one at a time. Stir in the flour and salt. The batter will be lumpy with the butter and flour. Don't over beat but try to eliminate the flour clumps.
Reduce the heat under the soup so it's at a very light simmer. Drop spoonfuls of the batter into the simmering soup. Cover and cook for 8 to 10 minutes. Check on the dumplings halfway through cooking and turn them over.
Allow the soup to cool slightly before serving.
Thứ Tư, 22 tháng 10, 2014
Recipe Redo: Chicken Gyros
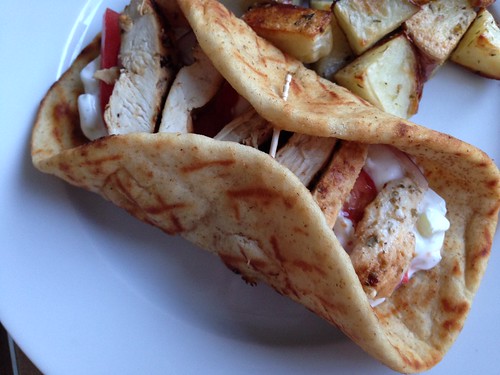
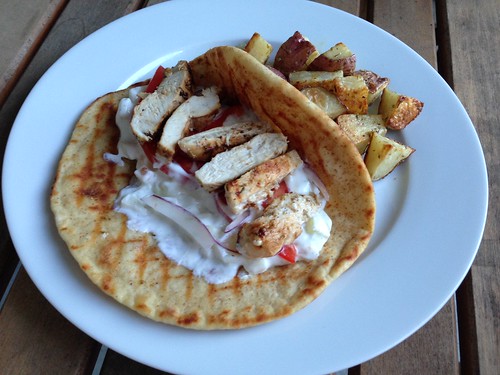
A few years ago I made these chicken gyros all. the. time. They were a staple on our dinner table and for good reason - they're delicious. It had been a very long time since I made them and since the photos I took back then weren't exactly stellar, I figured I'd revisit this old favorite and update the photos.
Unfortunately, I still didn't get a great shot of these but they're still better than the old photos. I served the gyros with roasted potatoes liberally seasoned with oregano. I loved dipping the potatoes into some of the leftover tzatziki sauce. Yum.
Chicken Gyros
As seen on Elly Says Opa!
4 cloves garlic, smashed
Juice of 1 lemon
2 teaspoons red wine vinegar
2 tablespoons extra virgin olive oil
2 heaping tablespoons plain Greek yogurt
1 tablespoon dried oregano
1 1/4 lbs. chicken breast, cut in half lengthwise
salt and pepper
1 cup tzatziki (see below)
sliced tomatoes
sliced red onion
4 pocketless pitas or flatbread
Whisk together the garlic, lemon juice, vinegar, oil, yogurt, and oregano in a bowl. Add the chicken and rub the marinade in. Cover and refrigerate for one hour.
Preheat a grill or grill pan over medium-high heat. Season the chicken with salt and pepper on both sides. Add the chicken to the hot grill pan and cook for 5 minutes. Flip over and cook for 4 minutes. Remove to a cutting board and allow the chicken to rest for a few minutes before slicing into strips.
While the chicken is cooking, heat your pitas. If you have a gas stove, turn on a burner to medium heat. Spray the pitas with a little bit of oil and cook them right on the burner for a few seconds per side.
Top the pita with some of the chicken, tzatziki, tomatoes, and onions. Roll up and eat. Be careful, they're messy.
Tzatziki
1 cup plain greek nonfat yogurt
1/2 a small cucumber
Salt and pepper to taste
1 small garlic clove, minced
Squeeze of fresh lemon juice
Put the yogurt in a bowl. Peel the cucumber, then cut it in half lengthwise and remove the seeds. Grate it over the large holes of a box grater. Place the grated cucumber in a clean kitchen towel and ring out the water over the sink. Add the cucumber to the yogurt, along with the other ingredients. Mix well. Taste and adjust the seasonings, as needed. Chill before serving.
Thứ Hai, 20 tháng 10, 2014
Spinach & Parmesan Orzo
::tap, tap, tap:: Is this thing on?
Sorry for disappearing there. I'm hoping some of you have stuck around despite the brief hiatus. I've been saying for months now that I've lost my blogging mojo and, well, it still hasn't returned. But I do have a few posts in my draft folder that I figured I should get published. I hope you guys will stick with me as I weather this (hopefully temporary) storm.
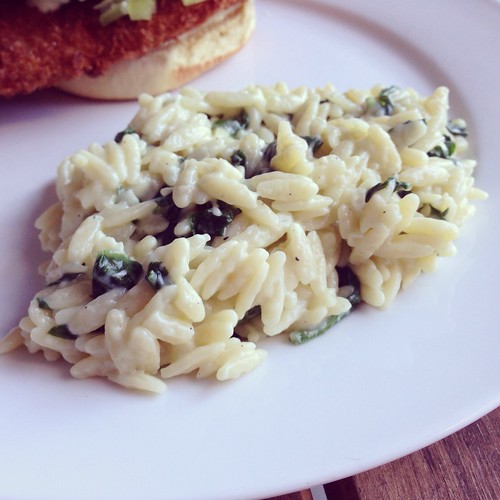
So...spinach and Parmesan orzo. I saw this one on my friend Kylee's blog and it looked like a great, simple side dish. Right up my alley these days.
As suspected, it was easy to make and we all loved it. Baby Girl kept calling it risotto, one of her all-time favorite cold weather meals. I'll definitely be making this one often.
Spinach & Parmesan Orzo
As seen on Kylee Cooks
8oz orzo pasta
1 tablespoon olive oil
2 garlic cloves, minced
1 tablespoon flour
1/2 cup milk
1 1/2 cups baby spinach, roughly chopped
1/2 cup parmesan cheese
Salt and pepper, to taste
Cook the orzo according to the package directions.
While the orzo is cooking, heat the olive oil in a saucepan. Add the garlic and cook just until it's fragrant.
Sprinkle the flour into the pot and stir to combine. Whisk in the milk, and continue to cook over low heat until thickened. Add salt and pepper to taste.
Once the orzo is cooked, drain it and add it to the sauce. Add the spinach and Parmesan. Stir gently to combine. Taste it and adjust the seasoning, as needed.
Đăng ký:
Nhận xét (Atom)

