Thứ Tư, 8 tháng 8, 2012

Guest Post - Skillet BBQ Chicken Pasta

Don't forget to enter my 6th blogiversary GIVEAWAY before 11:59pm Thursday, August 9.

Today's guest post is brought to you by Melissa from I Was Born to Cook. Melissa is a NJ native, like myself, and I actually met her on our local message board before I even knew there was a cooking board. I was really excited when Melissa decided to start a cooking blog. She was always talking about the awesome food she was cooking, so it was only natural that she share her talents with others. If you've never checked out her blog be sure to stop over - she has some wonderful recipes and a killer-sounding cannoli cheesecake that I MUST try soon.


Thanks for joining me here in honor of Sarah and her 6th blogiversary! It's quite an accomplishment, without a doubt...so I was thrilled to participate when she asked if I would guest post this week. Sarah was one of my first food blogging buddies - she's always been there with open ears, especially when I first started blogging, with advice on tips for this passion we share (and more). She's a good egg...no pun intended :)

Sarah's request was that I choose one of her recipes to make, and let me tell you, there are quite a few from her amazing collection! I still can't believe I didn't dive right into the Philly Cheesesteak Egg Rolls (although I came thisclose) or the Cheesy Zucchini Rice, given the overabundance of the green veggie these days. Both recipes look to die for and I'll be sure to try them out soon.

It just so happened that the day I was asked to participate, I had chicken breasts ready to go for dinner, and decided on this popular recipe of hers. It's something a bit different than what we'd usually do with our pasta here...and I can very safely say that it was a hit! We loved the tanginess of the barbecue sauce mixed with the sour cream. And of course, a whole lotta cheese always adds to the deliciousness.

Thanks again, Sarah, for including me...congratulations on a fantastic 6 years! Can't wait to see what's in store for the years to come :)

Skillet BBQ Chicken Pasta

1 tablespoon extra-virgin olive oil
2 boneless skinless chicken breasts, cut into bite-size chunks
1 red onion, diced
3 cups water
2 1/2 cups chicken broth
1/2 teaspoon salt
12 ounces penne pasta
1 cup barbecue sauce
1/3 cup sour cream
1/2 cup shredded pepperjack cheese
1/2 cup shredded sharp cheddar cheese

In a large 12-inch nonstick skillet heat the olive oil over medium heat. When hot, add the chicken and onions and saute, stirring occasionally, until the chicken is browned and cooked through. Remove the chicken and onions to a plate and set aside.

In the same skillet, add the water, chicken broth, penne and salt. Bring to a boil and simmer for 12 to 15 minutes, until the liquid is almost absorbed, the pasta is tender and the mixture is thick and syrupy. Stir in the barbecue sauce and sour cream. Once mixed, add in the reserved chicken, onions and shredded cheeses. Stir to combine and cook until everything is heated through.

Taste and season with salt and pepper, if needed. Garnish with additional red or green onions and more shredded cheese.

Thứ Ba, 7 tháng 8, 2012

Guest Post - Black Bean Patties with Corn Relish and Avocado Cream

Don't forget to enter my 6th blogiversary GIVEAWAY before 11:59pm Thursday, August 9.

Today's guest post comes from Jenna at Jenna's Cooking Journey. Jenna is one of the ladies on my cooking board. We "met" when she started participating in the recipe swaps I host and our friendship developed from there. She recently moved to NJ from WY, which means we are finally going to have a chance to meet in person! I can't wait. We've got big foodie plans, namely heading into Philly to hit up the Reading Terminal Market. It's been wonderful to see her grow as a blogger and her recipes are always delicious.


I was so honored that Sarah asked me to do a guest post on her blog. I started my blog because of the recipe swaps that Sarah coordinates, so I guess in a way, Sarah is the reason that I started my blog. I have now been going one year strong and am glad that I still get to participate in the swaps Sarah hosts.

I have had my eye on these Black Bean Patties with Corn Relish and Avocado Cream Sauce ever since Sarah posted them back in June. I feel like it had two things going for it: 1) It seemed substantial enough that my husband wouldn’t walk away hungry (which sometimes happens during vegetarian nights at our house) and 2) These seem like they have a ton of flavor, which let’s face it using things like light sour cream makes some people think they’re sacrificing all the good flavor in a meal.

As I was constructing these, the critic came out a little bit in my husband. He sniffed the black bean puree in the food processor, and wrinkled his nose. He said, “Have you smelled that?” I laughed and said it probably smelled like black beans, and he walked away saying some other stuff about it. He promised he’d eat it happily since we haven’t had a bad meal in a long time. So, I shook my head at his judgment and kept constructing the patties.

I have to say that I thought the corn relish was one of the best things I’ve tasted in a long time. It was so bright and fresh that it was very hard for me not to snack on it while everything was coming together. I thought all the flavors were great in this dish. Everything complemented each other well and came together for a great meal. The only problem that I had was that my bean patties fell apart while I flipped them. I thought the mixture was firm enough, but apparently I should have added a little more panko. My husband didn’t complain about them, so he didn’t think they were bad, but I definitely could tell that he missed meat being on his plate.

Black Bean Patties with Corn Relish and Avocado Cream

For the patties:
2 (15 oz.) cans Reduced sodium black beans, drained and rinsed
2 roasted red bell peppers, 1 coarsely chopped, 1 finely minced
2 large eggs
1 teaspoon oregano
1 teaspoon cumin
1/2 medium onion, finely diced
2/3 cup panko
Salt and pepper
Canola or vegetable oil

For the corn relish:
2 teaspoons canola oil
2 cups corn kernels
1 clove garlic, minced
1 jalapeño, seeded and minced
1 medium tomato, seeded and diced
Juice of 1 lime
2 tablespoons minced fresh cilantro
Salt and pepper, to taste
1 teaspoon cumin

For the avocado cream sauce:
1 avocado, pitted and coarsely chopped
1/2 cup light sour cream
1 teaspoon cilantro
Juice of 1 lime
Salt and pepper, to taste

1) Place half the beans in a food processor with coarsely chopped bell pepper, the eggs, oregano, and cumin. Process until smooth.

2) In a large bowl, lightly mash the remaining beans. Stir in the remaining bell pepper, onion, and smooth bean mixture. Season to taste with salt and pepper. Stir in the panko mixing lightly. Chill for 30 minutes.

3) While the bean mixture is chilling, heat the canola oil in a skillet over medium-high heat. Add the corn and sauté until lightly browned, 2-3 minutes.

4) Stir in the garlic and jalapeño and cook about 1 minute.

5) Transfer the mixture to a bowl. Stir in the tomato, lime juice, cilantro, and cumin. Season with salt and pepper to taste.

6) To make the avocado cream sauce, combine all ingredients in a food processor until smooth.

7) Form the bean mixture into patties. Heat about 2 tablespoons of canola oil in a large skillet over medium heat.

8) Add the patties in batches, cooking until lightly browned and firm, about 3-4 minutes per side.

9) Serve the patties warm topped with the corn relish and drizzled with the avocado cream sauce.

Thứ Hai, 6 tháng 8, 2012

Guest Post - Hawaiian Chicken Sandwiches

Don't forget to enter my 6th blogiversary GIVEAWAY before 11:59pm Thursday, August 9.

On Saturday I brought you a GIVEAWAY to celebrate A Taste of Home Cooking's 6th anniversary. Today I'm bringing you the first of six guest posts written by some of my food blogging friends. I asked six bloggers to pick a recipe from my blog to make, photograph and write about. I'm thrilled that these ladies wanted to help me celebrate.

One of the best things about food blogging has been meeting new people. One of those people is Cassie from Cassie Craves. Her food style is so similar to mine that many of my favorite recipes came from her blog. She's also become a friend despite the fact that we've never met in person. I love watching her two boys grow on Facebook. Thanks for being part of my blogiversary, Cassie!


I'm thrilled and honored to be kicking off the celebration of Sarah's sixth blogging anniversary! Sarah's was one of the first food blogs I ever read, was one of my major inspirations for starting my own food blog, and to this day is still one of my very favorite blogs to read. Her food philosophy is so in line with my own, and every day I'm amazed and inspired by her commitment to her blog and to her readers. Thank you, Sarah, for including me in this celebration, and congratulations on six years of fabulous food!

As I was searching the blog, trying to wittle down a recipe to try (I had a list, and it was very long), I came across so many recipes that my family has tried and loved. Many of them have even become family favorites that I make again and again, like this Mexican sour cream rice, this bacon pierogi bake, and these Philly cheesesteak sloppy joes.

I finally decided on these grilled Hawaiian chicken sandwiches, because Sarah absolutely loved them and made them twice in back to back weeks. Like me, she tries lots of new recipes, so I knew if she made a recipe two weeks in a row it had to be really good! Well, guess what? I loved these sandwiches too. They're so simple and they come together so quickly -- just a handful of ingredients, and only about 15 minutes of active cooking time -- but they taste incredible. The sweet-and-salty marinade gives the chicken so much flavor and makes it so tender and juicy. Grilling the pineapple until it caramelizes slightly adds such a delicious, smoky-sweet flavor. I only made one minor change, and that was to use honey mustard in the marinade rather than Dijon, just because I had it on hand. It worked perfectly. A dollop of creamy mayonnaise was the perfect finishing touch for these sandwiches. I'm sure they're destined to become a family favorite in my house, just like so many of Sarah's recipes, and like her, I just may have to make them next week too.

Grilled Hawaiian Chicken Sandwiches

2 large boneless skinless breast of chicken
1 large can pineapple rings (8 rings)
2 tablespoons soy sauce
2 tablespoons brown sugar
2 teaspoons honey mustard (or Dijon)
4 slices provolone cheese
4 hamburger buns or kaiser rolls
A smear of mayo

Pound out the chicken breasts and slice each into two pieces. Combine the juice from the pineapple can, soy sauce, brown sugar and mustard. Marinate the chicken overnight in the the juice mixture.

Prepare your grill. Grill the chicken for 15 minutes, flipping once halfway through. Add the cheese with 3 minutes left. While the chicken is grilling, add the pineapple rings halfway through, turning once. Smear some mayo on the buns, then top with a piece of chicken and two pineapple rings each.

Thứ Bảy, 4 tháng 8, 2012

Curry Chicken Salad with Cranberries and Pine Nuts and a GIVEAWAY!!

The giveaway is now closed. Congratulations to JKT!

Happy Blogiversary to A Taste of Home Cooking! Hard to believe it's been 6 years since I first entered the world of food blogging. Where does the time go? It feels like only yesterday I was artfully arranging my Cobb salad, snapping a few pictures and trying to come up with a catchy blog title.


I've got a few fun things planned to celebrate the milestone, the first being a GIVEAWAY! It's been awhile since I've done one and what better excuse than an anniversary.

I received a copy of The Busy Mom's Cookbook: 100 Delicious, Quick and Easy Recipes by Antonia Lofaso. I couldn't wait to look through it. I've already got my eye on a few of the recipes and had a very hard time picking something to make. In the end my love of chicken salad, especially curry chicken salad, won out.

I usually make my curry chicken salad with grapes and walnuts, so subbing dried cranberries and pine nuts sounded interesting. I had to add a minced stalk of celery for crunch but otherwise I made the recipe as printed. And it was delicious! I think I still prefer the grapes to dried cranberries solely because of the moisture the grapes add to the chicken salad, but I'd totally use both next time. The pine nuts were a great sub. I love pine nuts and any excuse to use them, although they can be a pricey ingredient.


The Giveaway
One lucky U.S. reader have a chance to win The Busy Mom's Cookbook: 100 Delicious, Quick and Easy Recipes. Here’s how you can enter:

1. Leave a comment on this post telling me your favorite home-cooked meal for 1 entry.

2. Like A Taste of Home Cooking on Facebook for 1 entry. Leave a separate comment letting me know you did so.

3. Follow A Taste of Home Cooking on Twitter for 1 entry. Leave a separate comment letting me know you did so.

RULES: Maximum of three (3) entries per person. This giveaway opens Saturday, August 4 at 7:00am EST and will close Thursday, August 9 at 11:59 p.m. EST. The giveaway is only open to U.S. residents. Be sure a valid email address is included with your comment(s). Winner will be chosen randomly and contacted via email. If the winner doesn’t respond in 48 hours, a new winner will be chosen. Good luck!

Curry Chicken Salad with Cranberries and Pine Nuts
From Antonia Lofaso

4 tablespoons raw pine nuts
2 cups (1 lb) chopped cooked chicken
1/3 cup mayo
8 teaspoons chopped fresh cilantro
4 teaspoons chopped red onion
2 teaspoons curry powder
1/4 cup dried cranberries
Salt and Pepper to taste
8 cups mesclun greens (if serving as a salad)
8 slices hearty white bread, toasted (if serving as a sandwich)
1 lime, halved

Heat a saute pan on low. Add the pine nuts to the pan and let them toast, stirring occassionally, for 5 to 6 minutes, until golden brown.

In a large bowl, mix the chicken, mayo, cilantro, red onion, curry powder, cranberries and toasted pine nuts. Season the mixture with salt and pepper. Spoon the chicken salad over the mesclun greens (or place on toasted bread with a handful of salad greens). Squeeze the lime over the salad before serving.

Disclosure: This giveaway is provided by Penguin Books, but my opinions are completely my own. I received a free copy of the cookbook.

Thứ Sáu, 3 tháng 8, 2012

Tilapia Francese


Melissa has had a photo of this Tilapia Francese as her signature picture on our cooking board for awhile now. Every time I see it I think, "why haven't I made that recipe yet?" When I had 3 filets of tilapia left after making the Tilapia Parmesan recently I knew exactly what I was going to make.


We recently went to a 1st birthday party at an Italian restaurant. One of the dishes they served was Tilapia Francese. I wish I'd known it was coming so I could have saved some room. It arrived at the table after the stuffed mushrooms, mozzarella sticks, salad, three different types of pasta, eggplant rollatini and chicken parmesan. Like I said, it was an Italian restaurant. Eating a small piece at the party made me even more excited for this dish.


I'm happy to report this was exactly like what was served at the party. Even SP agreed this was a restaurant-quality meal. I wanted some extra sauce to toss with the pasta so I increased the white wine and lemon juice but also added chicken broth to mellow out the flavors and add some body. It was perfect. Silky smooth from the flour on the fish and just tangy enough from the lemon juice.

Thanks for an awesome recipe, Melissa!

Tilapia Francese
Slightly adapted from I Was Born to Cook

1/2 cup flour
Salt and pepper to taste
1 egg
2 tablespoons water
3 pieces tilapia filets
1 tablespoon butter
2 tablespoons extra virgin olive oil
1/2 cup freshly squeezed lemon juice
1/2 cup dry white wine
1 cup chicken broth
2 tablespoons minced parsley
1/2 lb spagetti or other pasta, cooked according to package directions

Place flour in a pie plate and season with salt and pepper. Beat the egg and water in a second pie plate. Gently coat each tilapia filet with flour on both sides, then place in the egg wash, coating on both side, then put back in the flour and coat on both side.

Heat butter and oil in a non-stick skillet over medium heat. Place tilapia in pan and cook for about 2-3 minutes on each side until golden brown. Add lemon juice and wine and cook for another 5-7 minutes. Do not flip the fish over once the liquid has been added. Remove the tilapia from the pan. Add the chicken broth and season with salt and pepper to taste.

Top the tilapia with some of the sauce and garnish with lemon slices and chopped parsley. Toss the spaghetti or pasta with the rest of the sauce. Serve immediately.

Thứ Năm, 2 tháng 8, 2012

Recipe Swap Roundup - Blogger's Choice Part 5

Another Blogger's Choice swap successfully completed. This time we had 35 (!!!) people participating in the swap. That's a lot of participants and in an effort to get this post published before too much time goes by I'm doing things a little differently. As you can see below, I'm only including the blogger's name, the link to the recipe made and the name of the blogger they had for the swap. Please click through to read more about the recipes that were made.

I made Chili Lime Tofu with Rice and Spinach from Stefanie:


Jenna made Cilantro Lime Chicken Tacos from Joelen:


Lisa made Berry White Popsicles from Nichole:


Christine Magic in the Middles from Nicole:


Kate made Chicken Parmesan Burgers from Dawn:


Nicole made California Roll Lettuce Roll-Ups from Lisa:


Melissa made Baked Blueberry Oatmeal from Kate:


Jessica made Blueberry Lemon Loaf from Jenna:


Stefanie made Chicken, Bacon & Ranch Taquitos from Carrie:


Jenni made Corn, Avocado, and Tomato Salad from Amy:


Coleen made Baked Ziti with Bolognese from Lishie:


Heather made Beef with Eggplant from Jessica:


Cara made Cinnamon Bran Muffins from Mary Ellen:


Joelen made Peanut Butter & Honey Popcorn from Melissa:


Melissa made Chocolate Pudding from Angie:


Catherine made Fajita Pasta from Jennifer:


Mary Ellen made Apple Dumplings from Kylee:


Angie made Great Grains Muffins from Jessica:


Jaida made Zucchini Ravioli with Dill Sauce from Catherine:


Carrie made Ground Beef Ricotta Bake from Kristina:


Katie made Rich Chocolate Brownies from Jenni:


Dawn made Hawaiian Pulled Pork from Melissa:


Jey made Tilapia with Bacon Tomato Butter from Amy:


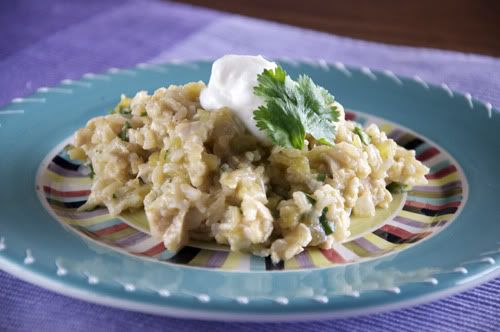
Jessica made Chicken Chile-Cheese Rice from Ashley:


Jennifer made Honey-Glazed Chicken Drumsticks from Coleen:


Krystal made General Tso's Chicken from Katie:


Nicole made Gnocchi Mac and Cheese from Christina:


Kylee made Chicken Diablo from Jaida:


Nichole made Alice Springs Chicken from Heather:


Ashley made Island Spiced Pork Tenderloin from Christine:


Christina made Summer Spaghetti from Cara:


Lishie made Lentil Bolognese from Nicole:


Kristina made Panko-Crusted Chicken with Mustard-Maple Sauce from Krystal:


Amy made my Greek Chicken Burgers with Tzatziki:


Amy made Jalapeno Popper Dip from Jey

Thứ Tư, 1 tháng 8, 2012

Italian Mac and Cheese


I can't tell you the last time I made mac and cheese. I love the stuff, but pasta drenched in cheese sauce isn't exactly on the new diet plan. Recently I had some leftover salami and a basil plant that was getting out of control, so I turned to this Italian Mac and Cheese I saw on Cassie's blog.

I've been loving roasted tomatoes lately and I was happy to make my own pesto with fresh-from-the-garden basil. The sauce ended up being a bit too heavy for us, but I think a lot of that has to do with the way we've been eating lately. I've modified the recipe below to be a little lighter, upping the chicken broth and decreasing the milk. I also upped the amount of tomatoes to 2 pints because 1 pint was just not enough.

This was a great way to use up some odds and ends around the house, with nice bright summer flavors from the tomatoes and pesto.

Italian Macaroni and Cheese
Slightly Modified from Cassie Craves

12 ounces penne
2 pints cherry tomatoes
1 tablespoon olive oil
1 tablespoon balsamic vinegar
Salt and pepper
2 tablespoons butter
1 onion, chopped
4 ounces Genoa salami, chopped
3 cloves garlic, minced
2 tablespoons flour
1/2 cup white wine
1 cup chicken stock
1 cup milk
2 cups shredded Italian cheese blend
1/4 cup pesto

Cook penne in boiling salted water according to package directions; drain.

Meanwhile, preheat the oven to 400 degrees. Place tomatoes on a foil lined baking sheet. Drizzle with olive oil, balsamic vinegar, and salt and pepper. Cook until tomatoes are bursting, about 15 minutes. Allow to cool slightly and remove the skins, if desired.

While tomatoes are roasting, melt the butter in a large saucepan over medium heat. Add onion and salami and cook until onion is softened. Add garlic; cook and stir for 1 minute. Add flour and stir until the ingredients are coated and the mixture is bubbling, about 1 additional minute.

Stir in wine and cook until reduced. Stir in chicken stock and milk. Heat to boiling, then reduce heat. Stir in cheese until melted, then add the pesto. Season with salt and pepper to taste. Combine penne, roasted tomatoes, and cheese sauce. Serve immediately.